If you work from home, your body has probably sent you a few complaints this year: a stiff neck by 3 p.m., a dull ache between your shoulder blades, wrists that feel tight after a long stretch of typing. None of that is random. It’s the direct result of a workstation that wasn’t actually built around you — and a proper Ergonomic Desk Setup is the fix.
The good news is that fixing it doesn’t require a full office overhaul. According to research from the CDC’s National Institute for Occupational Safety and Health (NIOSH), most remote-work discomfort comes down to a handful of fixable factors: posture, monitor position, input device placement, and how often you move. Get those right, and you eliminate the majority of desk-related pain — without spending a fortune.
This guide walks through every part of a proper ergonomic setup, in the right order, with the actual measurements to use.
Why the Order You Adjust Things Actually Matters
Most people set up their workstation backwards. They plant a monitor on the desk, pull up a chair, and start typing — then wonder why their neck hurts by lunchtime.
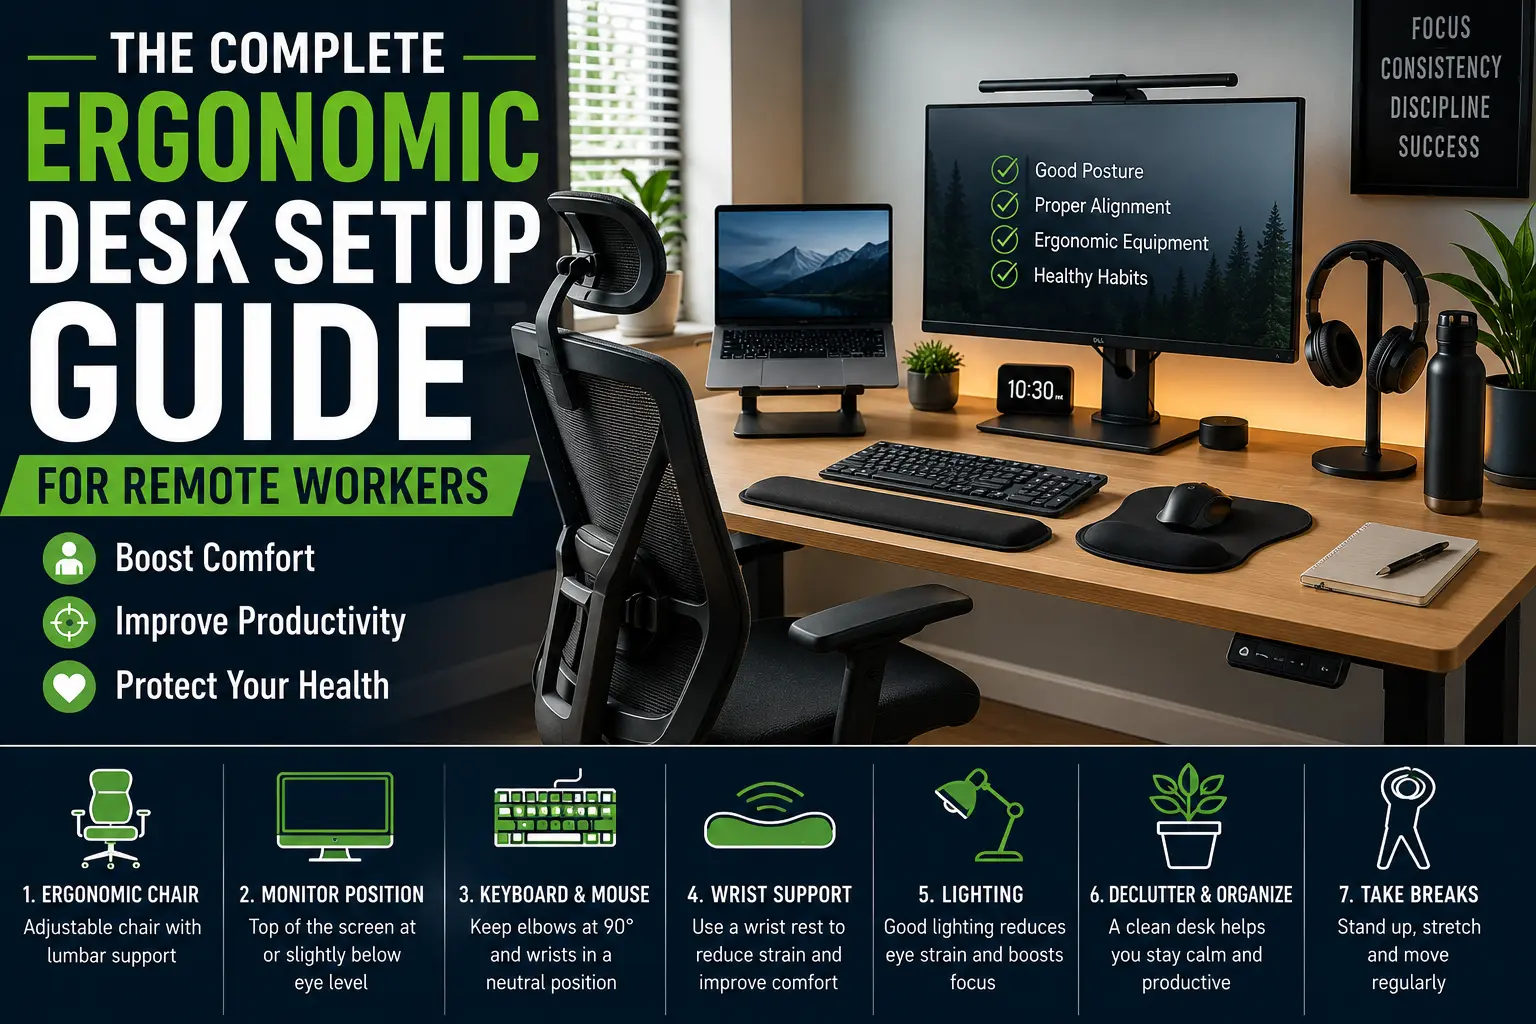
Ergonomics specialists recommend working through your setup in this sequence:
- Chair first — it determines your elbow and hip height for everything else.
- Desk height second — set so your forearms are level while typing.
- Monitor third — positioned relative to your eyes, not the desk surface.
- Keyboard and mouse last — placed where your wrists naturally fall.
Adjusting in any other order means you’re compensating for a bad chair position with a hunched neck, or fixing wrist strain by twisting your shoulders. Fix the base first, and everything above it falls into place with far fewer small adjustments.
Step 1: Get Your Chair Position Right
Your chair sets the foundation for your entire posture. NIOSH’s guidance for home workstations centers on a seated posture that supports the natural inward curve of your lower spine (lordosis), rather than letting your back round forward or go completely flat against a rigid chair back.
Target measurements:
- Feet: Flat on the floor, or on a footrest if your chair can’t go low enough for your height.
- Knees: Roughly level with or slightly below your hips, with a couple of fingers’ width of space behind the knee and the seat edge.
- Thighs: Parallel to the floor, not pressing into the front of the seat.
- Lower back: Supported by the chair’s lumbar curve, or a rolled towel/cushion if your chair is flat-backed.
- Shoulders: Relaxed and down, not hunched toward your ears.
- Elbows: Bent at roughly 90–110°, close to your sides.
If your chair doesn’t support your lower back well, that’s usually the single highest-value upgrade you can make — more impactful than a new desk or monitor. This is the same principle behind wrist and forearm support products: the goal is always to remove strain from a joint before it becomes chronic pain. It’s worth reading through 7 signs you need an ergonomic wrist rest if you’re noticing similar early warning signs in your hands, since wrist strain and poor chair posture tend to show up together.
Step 2: Set the Desk to Elbow Height
Once your chair is dialed in, adjust your desk (or keyboard tray) so that your forearms rest level with the desk surface when your elbows are at that 90–110° angle. If you’re standing at a sit-stand desk, the same rule applies: the surface should sit at or just below elbow height.
If your desk isn’t height-adjustable and it’s too high for your chair position, don’t raise your chair to compensate — that throws off your feet and knee position. Add a footrest instead, or lower the desk with an adjustable keyboard tray.
Step 3: Position the Monitor for Your Eyes, Not the Desk
This is where most home setups go wrong. Laptops and monitors placed flat on the desk sit too low, forcing your neck to bend forward for hours — the single biggest contributor to desk-related neck and upper-back pain.
Correct monitor position:
- Height: The top third of the screen should be at or slightly below eye level. Your eyes should land near the top of the screen when looking straight ahead, not the middle.
- Distance: About an arm’s length away — roughly 20–28 inches.
- Angle: Centered directly in front of you, tilted back slightly (around 10–20°) so the center of the screen is a little below eye level.
A simple way to check this: sit in your normal position, look straight ahead without moving your head, and note where your eyeline naturally lands on the screen. If it’s below the top third, the monitor needs to come up — with books, a monitor riser, or an arm.
If you’re working from a laptop, the built-in screen sits far too low for this standard. Raise the laptop to eye height and connect an external keyboard and mouse, rather than typing on a laptop propped up on a stand.
Step 4: Place the Keyboard and Mouse Where Your Wrists Actually Fall
Wrist and hand strain builds slowly, which is exactly why so many remote workers ignore it until it’s a real problem — sore hands after typing all day, tightness that doesn’t fully go away overnight, or a dull ache creeping up the forearm.
Keyboard placement:
- Close enough that your elbows stay near your sides, not reaching forward.
- Flat, or with a slight negative tilt (front edge higher than the back) rather than the built-in kickstand tilt most keyboards ship with — that kickstand tilt actually bends your wrists upward, which is the opposite of what you want.
- Wrists straight and hovering, not resting on a hard desk edge while typing.
Mouse placement:
- Right next to the keyboard, at the same height, so you’re not reaching or dropping your shoulder to use it.
- Move it with your whole arm rather than flexing your wrist side to side.
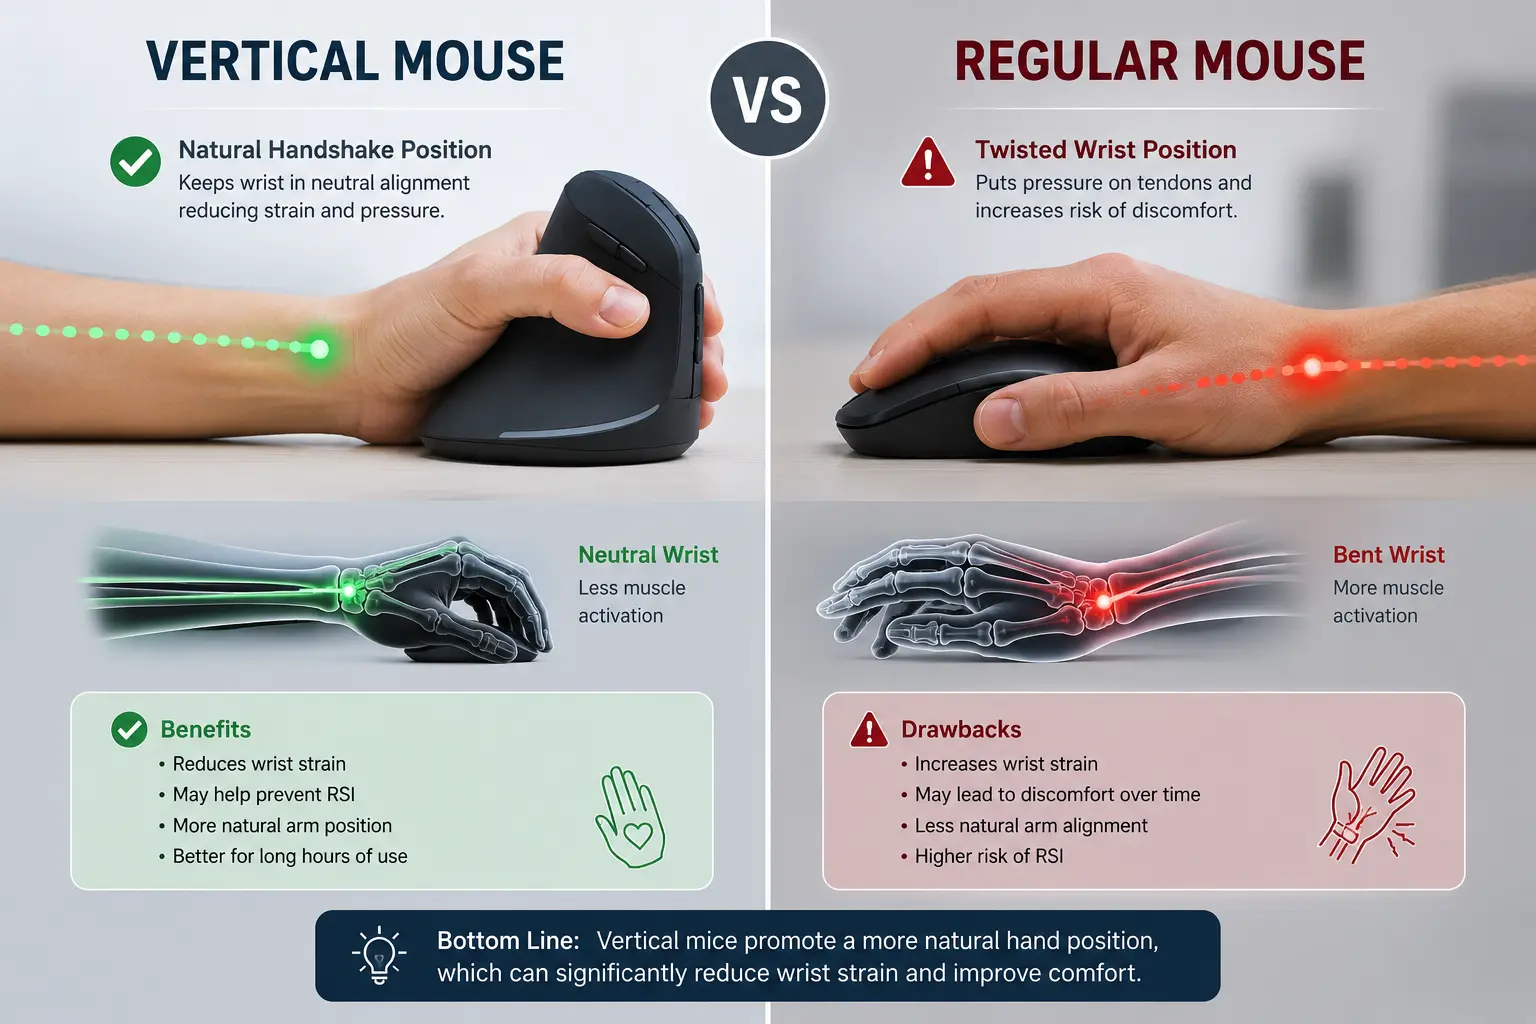
This is exactly the strain pattern covered in our breakdown of the best ergonomic mouse options for gamers — the same wrist mechanics apply whether you’re gaming for six hours or typing through back-to-back meetings. A vertical or contoured mouse can meaningfully reduce forearm rotation for people who spend most of the day clicking.
If your wrists are already sore by early afternoon, a support product can bridge the gap while you fix your overall setup. We’ve covered this in detail in our complete guide to the BadSeed Tech Carpio wrist rest, including how it compares against the Carpio 2.0 vs. Carpio G2.0 if you’re deciding between DeltaHub’s two versions. Worth noting: a wrist rest supports your wrist between keystrokes — it doesn’t replace fixing your keyboard height or chair posture, which are the actual root causes of most wrist pain.
Step 5: Don’t Skip Lighting
Lighting doesn’t get discussed as often as posture, but eye strain from poor lighting causes people to unconsciously lean forward toward the screen — which undoes all the posture work above.
- Position your monitor perpendicular to windows, not facing them or with your back to them, to avoid glare and backlighting.
- Use a desk lamp for task lighting rather than relying on overhead light alone, especially in the evening.
- Match your screen brightness to the room around you — a screen that’s much brighter or dimmer than the room forces your eyes to work harder.
Step 6: Build In Movement — This Matters More Than People Think
Even a perfect static setup causes problems if you never move out of it. NIOSH research found that overall musculoskeletal discomfort and eyestrain dropped significantly when standard breaks were supplemented with an additional short break every hour — even just five minutes of standing, stretching, or walking.
A simple structure that works well for most remote workers:
- One longer break around midday (lunch).
- A 5-minute break from your screen roughly once an hour — stand, stretch, walk to get water, climb a flight of stairs.
- If you have a sit-stand desk, alternate positions rather than standing all day, which creates its own fatigue over time.
If your job involves long uninterrupted stretches at the keyboard — coding, data entry, competitive gaming — this movement habit matters as much as any piece of hardware you buy. It’s the same underlying issue we cover across our gaming health category: the damage isn’t usually from one bad session, it’s from thousands of hours of unbroken static posture.
Budget-Friendly Fixes vs. Bigger Upgrades
You don’t need to buy everything at once. If you can only fix one or two things this month, prioritize in this order:
- Chair adjustment or lumbar support — often free, just requires setting it correctly.
- Monitor height — a stack of books works before you buy a riser.
- A footrest — cheap, and solves the “chair too high” problem instantly.
- Wrist support — for anyone already noticing tightness or soreness during long sessions.
- A sit-stand desk converter — the most expensive fix, but the highest long-term payoff if you sit for 6+ hours a day.
Common Mistakes to Avoid
- Adjusting the chair to match the desk instead of the other way around — this is backwards and creates a cascade of bad posture.
- Using the kickstand tilt on your keyboard — it feels natural but bends your wrists upward under load.
- Working from the couch or bed regularly — there’s no way to hit correct elbow, wrist, or monitor height without a real desk surface.
- Treating a wrist rest as a fix for a bad setup — it helps, but it’s a supplement to correct posture, not a replacement for it.
- Sitting still for hours without a break — even a perfect setup causes discomfort if you never move out of it.
Quick Reference Checklist
- Feet flat on floor or footrest, knees roughly level with hips
- Lower back supported, shoulders relaxed
- Elbows at 90–110°, forearms level with desk
- Top third of monitor at or slightly below eye level
- Monitor an arm’s length away, centered in front of you
- Keyboard flat or slight negative tilt, close enough to keep elbows in
- Mouse at the same height as the keyboard, moved with the arm not the wrist
- Screen positioned to avoid window glare
- A 5-minute movement break roughly every hour
Final Thoughts
An ergonomic desk setup isn’t about buying the most expensive chair or monitor arm on the market — it’s about getting a handful of measurements right and building in regular movement. Start with your chair, fix your monitor height, then move on to keyboard, mouse, and lighting. If your hands and wrists are still bothering you after the bigger fixes are in place, that’s the point where a dedicated support product — like the options covered in our DeltaHub and Carpio guides — actually makes a difference, rather than papering over a setup that’s fighting your body all day.
Fix the foundation first. Everything else gets easier from there.